How to create a simple Tic Tac Toe game using HTML, CSS, and JavaScript
Table of Contents
- Introduction
- HTML Setup, Emmet
- Styling the board with CSS
- Adding interactivity
- Handling wins
- Adding a reset button
- Links to playable game and repository
Introduction
Tic Tac Toe is an excellent project for beginners in game development. Its simplicity makes it approachable, yet it encompasses key fundamental concepts essential for developing more complex games.
HTML Setup, Emmet
Let’s start with creating a basic HTML file.
<!-- index.html -->
<!DOCTYPE html>
<html lang="en">
  <head>
    <meta charset="UTF-8" />
    <meta name="viewport" content="width=device-width, initial-scale=1.0" />
    <title>Tic tac toe</title>
  </head>
  <body></body>
</html>
This is the default Emmet template, updated with the title of our game. Emmet is a useful HTML helper for creating complex code blocks quickly. It’s available by default in VS Code and we will use it to generate the HTML for the 3x3 board.
To create the board using Emmet, we’ll type this in the <body>:
div.board>div.row*3>div.tile*3
and press the Tab key. It will generate this HTML:
<body>
  <div class="board">
    <div class="row">
      <div class="tile"></div>
      <div class="tile"></div>
      <div class="tile"></div>
    </div>
    <div class="row">
      <div class="tile"></div>
      <div class="tile"></div>
      <div class="tile"></div>
    </div>
    <div class="row">
      <div class="tile"></div>
      <div class="tile"></div>
      <div class="tile"></div>
    </div>
  </div>
</body>
It’s a 3x3 board with 3 rows and 3 tiles in each row with proper CSS classes. Quite convenient, isn’t it? For games with larger boards we would typically create the board programatically to save lines of code and make the code easier to check, but for 3x3 boards, defining each cell in HTML is totally fine.
If we open the HTML file in the browser, we won’t see anything. This is because we haven’t defined the grid lines and shape of the tiles. Let’s add some CSS in <head>:
Styling the board with CSS
<style>
  .tile {
    height: 200px;
    width: 200px;
    border: 1px solid black;
  }
</style>

We now have square tiles with black borders but all 9 of them are in one column. Let’s fix that with flexbox.
<style>
  .row {
    display: flex;
  }

  .tile {
    height: 200px;
    width: 200px;
    border: 1px solid black;
  }
</style>
By default, divs have display property set to block, which causes their children with display: block to be rendered one under another.
Flex layouts order their children horizontally by default (due to the fact that justify-content has a default value of row).
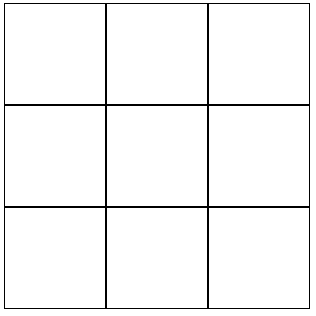
Something still seems odd. The borders inside the grid are thicker than the outside ones. This happens because both side and center cells have a 1px border on every side which together combine into 2px wide lines. Let’s make sure that there is maximum one line per column and row.
<style>
  .row {
    display: flex;
  }

  .tile {
    height: 200px;
    width: 200px;
    border-left: 1px solid black;
    border-bottom: 1px solid black;
  }
</style>
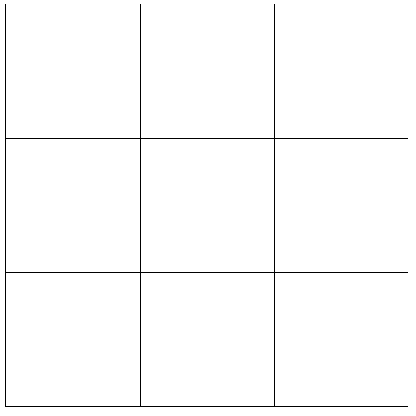
There are no duplicate lines now, but the top line and right lines are now gone. We can fix this by adding 2 borders on the board element.
.board {
  border-top: 1px solid black;
  border-right: 1px solid black;
}
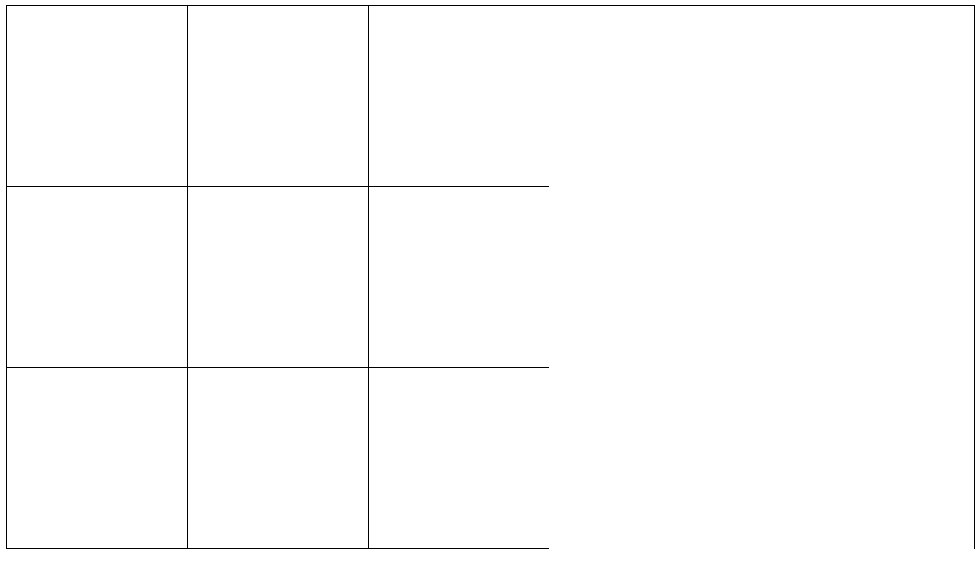
We have all the borders but the top line and right lines aren’t positioned correctly. This happens because the board takes the maximum available width. We can fix this by limiting width of the board to its content width by adding width: max-content to board styles.
.board {
  border-top: 1px solid black;
  border-right: 1px solid black;
  width: max-content;
}
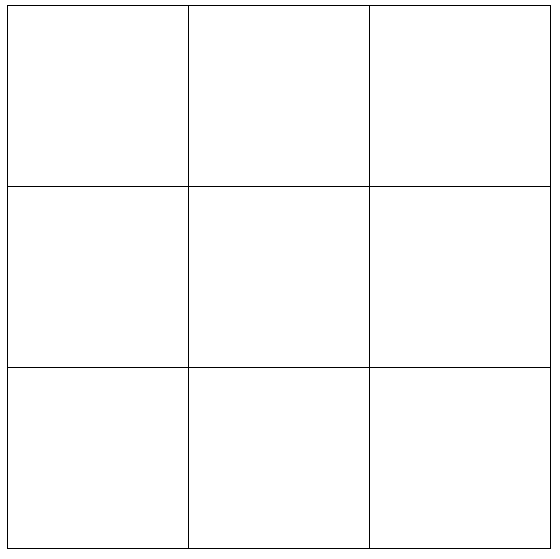
The board is now displayed correctly.
Bonus task
There is at least one different way of styling the borders that results in the same UI. Can you find it?
Adding interactivity
We want the game to be interactive with the player through mouse clicks. Let’s add a script tag inside head with click listeners attached to the tiles.
<script>
  const tiles = document.querySelectorAll(".tile");

  tiles.forEach((tile) => {
    tile.addEventListener("click", () => {
      tile.innerHTML = "X";
    });
  });
</script>
Nothing happens when the tiles are clicked…
Let’s log them to see why.
<script>
  const tiles = document.querySelectorAll(".tile");

  console.log("tiles", tiles);
  tiles.forEach((tile) => {
    tile.addEventListener("click", () => {
      tile.innerHTML = "X";
    });
  });
</script>
If we open up the console we can see an empty NodeList:

This happens because at the moment of executing our JavaScript code, the HTML code inside <body> hasn’t executed yet.
We can solve the issue by moving the script tag at the end of the <body>.
  <script>
    const tiles = document.querySelectorAll(".tile");

    console.log("tiles", tiles);
    tiles.forEach((tile) => {
      tile.addEventListener("click", () => {
        tile.innerHTML = "X";
      });
    });
  </script>
</body>
A small X appears in the tiles after clicking on them. We can also see that the NodeList contains 9 elements when we open the console.

Alternative solution
Instead of placing the script tag at the end of the body, we can use DOMContentLoaded event listener to wait for the DOM to fully load before executing the script.
Back to CSS
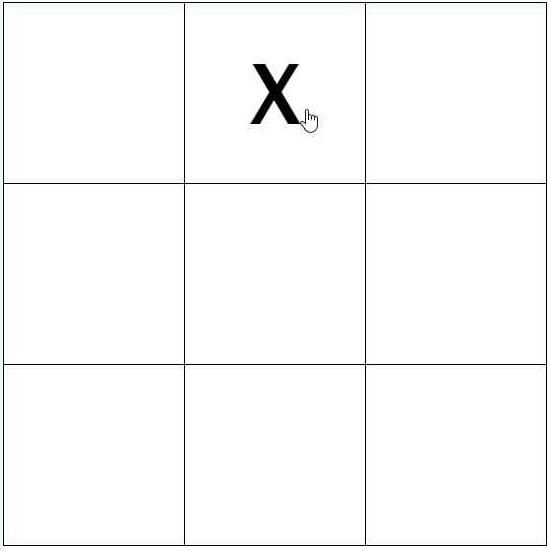
We’ve added a tiny bit of interactivity, but the “X” looks unreadable. Let’s fix that by updating the font styles.
.tile {
  height: 200px;
  width: 200px;
  border-left: 1px solid black;
  border-bottom: 1px solid black;

  font-family: "Franklin Gothic Medium", "Arial Narrow", Arial, sans-serif;
  font-size: 100px;
  text-align: center;
  line-height: 200px;
  user-select: none;
  cursor: pointer;
}
The X symbols are now readable and centered. We’ve also added user-select: none which prevents users from selecting the text and cursor: pointer which adds a nice cursor that encourages users to click the tiles.
Back to JavaScript
Now that we can add ‘X’ symbols, let’s make sure that we can add ‘O’ too to allow for a play between 2 players.
To do that we can create a currentPlayer variable with 2 available values: 'X' and 'O', but it is not type safe (a mistake can be easily made - one might type 'x' accidentally). We can improve the type safety by creating an object with all the possible values (or an enum if one is using TypeScript).
<script>
  // Object.freeze is optional but it will ensure that the `players` object is read-only
  const players = Object.freeze({
    x: "X",
    o: "O",
  });
  let currentPlayer = players.x;
  const tiles = document.querySelectorAll(".tile");

  tiles.forEach((tile) => {
    tile.addEventListener("click", () => {
      if (tile.innerHTML === players.x || tile.innerHTML === players.o) {
        return;
      }

      tile.innerHTML = currentPlayer;
      currentPlayer = currentPlayer === players.x ? players.o : players.x;
    });
  });
</script>
We’ve also added a check that will prevent the player from making a move on a filled tile.
Alternative approach
Instead of relying on string values, we can create a boolean variable named currentPlayerX with starting value true that changes to false after the first move is made. The code could look like this:
let currentPlayerX = true;
const tiles = document.querySelectorAll(".tile");

tiles.forEach((tile) => {
  tile.addEventListener("click", () => {
    if (tile.innerHTML === "X" || tile.innerHTML === "O") {
      return;
    }

    tile.innerHTML = currentPlayerX ? "X" : "O";
    currentPlayerX = !currentPlayerX;
  });
});
One problem with this approach is that we’re still using "X" and "O" strings to check if tiles are busy. Another problem might come when we’ll be trying to define a variable for the final game result (2 player wins, 1 draw) - we may need to refer to "X" and "O" in our code.
If we decide to use the players object, we can avoid such problems in the future.
Handling wins
Now let’s solve the core problem of the game - determining wins. To solve this, we’ll need to find a way to check for 3 identical symbols in one row, column or diagonal. There are a few ways to tackle this - let’s explore some options.
Method 1: Defining winning lines using indices
If we assign an index to each tile, we can define the winning lines using these indices.
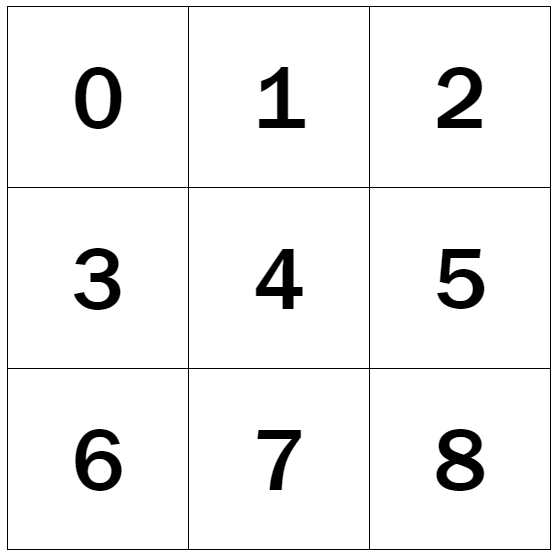
The first row consists of tiles indexed by 0, 1, 2. The second row of tiles 3, 4 and 5. The last row is therefore [6, 7, 8] (blue lines)
Columns consists of tiles: [0, 3, 6], [1, 4, 7], [2, 5, 8] (red lines)
Diagonals can be defined by tiles: [0, 4, 8], [2, 4, 6] (green lines)
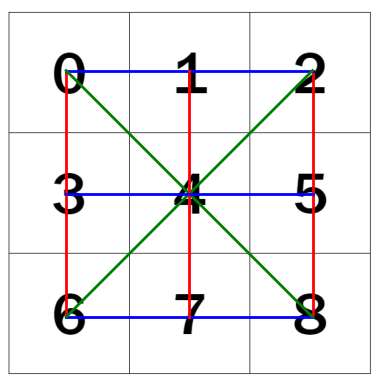
We can now use these indices in our code:
const board = Array.from(document.querySelectorAll(".tile"));
const rows = [
  [0, 1, 2],
  [3, 4, 5],
  [6, 7, 8],
];
const columns = [
  [0, 3, 6],
  [1, 4, 7],
  [2, 5, 8],
];
const diagonals = [
  [0, 4, 8],
  [2, 4, 6],
];
const winningLines = [...rows, ...columns, ...diagonals].map((line) =>
  line.map((index) => board[index])
);
We’ve used the spread syntax to help ourselves with joining multiple arrays into a single one.
This approach doesn’t scale very well with board size, so another approach is to use for loops combined with two dimensional board representation.
Method 2: Using for loops to iteratively create winning lines
const board = Array.from(document.querySelectorAll(".row")).map((row) =>
  Array.from(row.children)
);

const boardSize = 3;
const rows = [];
for (let rowIndex = 0; rowIndex < boardSize; rowIndex++) {
  let row = [];
  for (let columnIndex = 0; columnIndex < boardSize; columnIndex++) {
    row.push(board[rowIndex][columnIndex]);
  }
  rows.push(row);
}

const columns = [];
for (let columnIndex = 0; columnIndex < boardSize; columnIndex++) {
  let column = [];
  for (let rowIndex = 0; rowIndex < boardSize; rowIndex++) {
    column.push(board[rowIndex][columnIndex]);
  }
  columns.push(column);
}

const leftDiagonal = [];
const rightDiagonal = [];
for (let rowIndex = 0; rowIndex < boardSize; rowIndex++) {
  leftDiagonal.push(board[rowIndex][rowIndex]);
  rightDiagonal.push(board[boardSize - 1 - rowIndex][boardSize - 1 - rowIndex]);
}

const winningLines = [...rows, ...columns, leftDiagonal, rightDiagonal];
The above method is more complex but it scales nicely with the board size.
In our game, we’ll use the first approach for its simplicity. Let’s create a function called checkGameOver:
function checkGameOver() {
  const board = Array.from(document.querySelectorAll(".tile"));
  let winner = null;
  let isGameOver = false;

  const rows = [
    [0, 1, 2],
    [3, 4, 5],
    [6, 7, 8],
  ];
  const columns = [
    [0, 3, 6],
    [1, 4, 7],
    [2, 5, 8],
  ];
  const diagonals = [
    [0, 4, 8],
    [2, 4, 6],
  ];
  const winningLines = [...rows, ...columns, ...diagonals].map((line) =>
    line.map((index) => board[index])
  );

  const stringifiedLines = winningLines.map((line) =>
    line.map((tile) => tile.innerHTML).join("")
  );

  for (const line of stringifiedLines) {
    if (line === "XXX") {
      winner = players.x;
      break;
    }
    if (line === "OOO") {
      winner = players.o;
      break;
    }
  }

  const isGameDrawn = winner === null && isBoardFull(board);
  isGameOver = winner !== null || isGameDrawn;

  return { isGameOver, winner, isGameDrawn };
}
This should be all we need to check all the possible winning lines. We’ve also included a call to a nonexistent function isBoardFull that we’ll implement in the next step. The isGameOver and winner properties is all the information we need to determine whether the game was won and by who, or if it ended in a draw, but we’ve also included isGameDrawn property in the returned object for ease of use.
Let’s implement the isBoardFull function.
function isBoardFull(board) {
  return board.every((tile) => [players.x, players.o].includes(tile.innerHTML));
}
Our code with includes is a nice, shorter alternative to tile.innerHTML === players.x || tile.innerHTML === players.o.
We’ll now add 2 simple alerts to notify the players about the game outcome and test our code. We’ll also need to connect checkGameOver to the tile click listeners. Let’s update our existing code of tile click listeners:
tile.addEventListener("click", () => {
  if (tile.innerHTML === players.x || tile.innerHTML === players.o) {
    return;
  }

  tile.innerHTML = currentPlayer;
  currentPlayer = currentPlayer === players.x ? players.o : players.x;

  // check game state after making a move:
  const { isGameOver, winner, isGameDrawn } = checkGameOver();

  if (winner) {
    alert(`Game won by ${winner}`);
  } else if (isGameDrawn) {
    alert(`Game drawn`);
  }
});
Now both players can make a move, and are shown a simple alert after making the final move. There is a bug to fix though - empty tiles are interactive even after finish the game. Let’s fix that by extending the first guard statement.
tile.addEventListener("click", () => {
  if (
    tile.innerHTML === players.x ||
    tile.innerHTML === players.o ||
    checkGameOver().isGameOver
  ) {
    return;
  }
  // ...
We’ve added one more check that checks a new gameOver boolean value. Notice that we’re now calling checkGameOver in addEventListener’s callback twice. This is due to the fact that checkGameOver will return different values before and after the move. Alternatively, we can solve this problem by calling checkGameOver only once after making a move and storing the result in a global variable.
The bug has been fixed, let’s now add a reset button below the board to allow the players to start a new game.
Adding a reset button
We’ll add a button below the board:
<button id="resetButton" class="resetButton">Reset</button>
Style it:
.resetButton {
  font-size: 24px;
  margin-top: 10px;
}
And attach a listener to it in our
document.querySelector("#resetButton").addEventListener("click", () => {
  currentPlayer = players.x;
  tiles.forEach((tile) => {
    tile.innerHTML = "";
  });
});
The button resets the currentPlayer variable and iterates over the tiles to clear every one of them.
We now have a working button that resets the game to the initial state. This is the final functionality of the game that we have implemented in this tutorial. There are more things that can be implemented to the game, some ideas include:
- using custom graphics for X and O
- adding support for mobile devices by making the design more responsive
- highlighting the winning lines after the game is won
- replacing browser’s alerts with custom messages
- allowing the players to choose a different board size
- adding a single player mode where one player plays versus a bot
Links to playable game and repository
Final code of the game can be found here. Each step in the tutorial is represented by a single commit in the repository. The game can be played here.